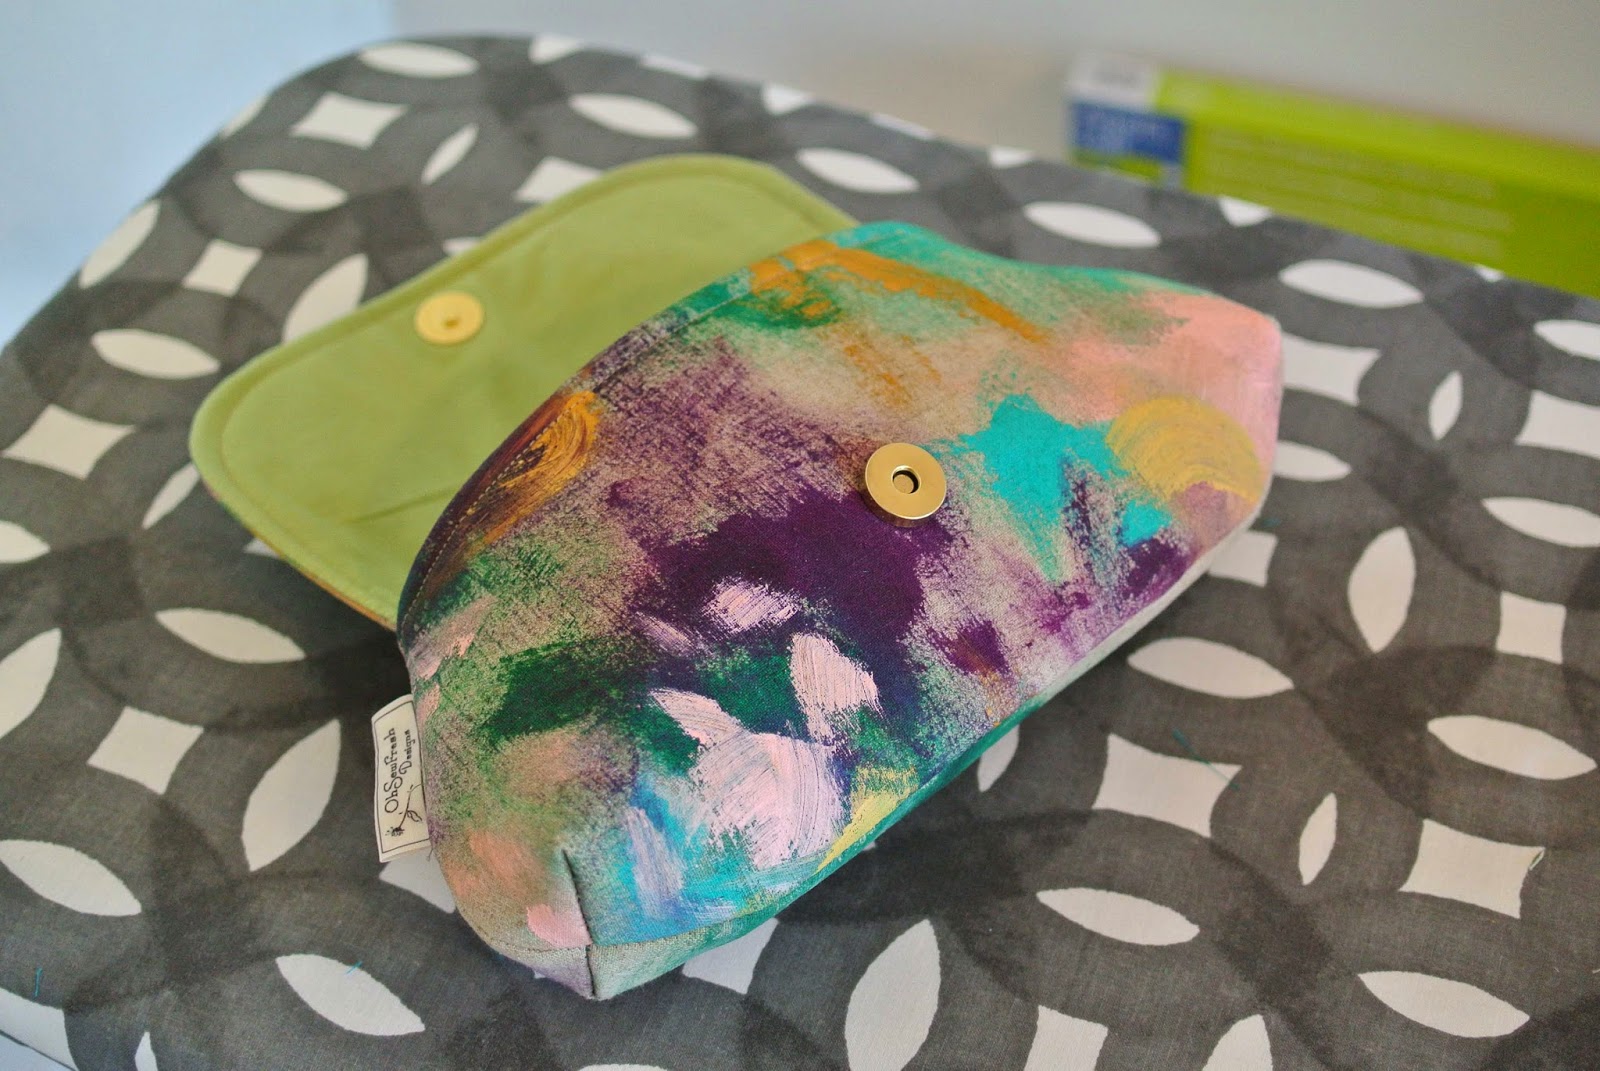
So here are some pictures of my clutches that I have sold. You can use most any fabric so long as it doesn't stretch or isn't too slippery. Cotton and linen or canvas work the best. You can add embellishments or keep them plain.


This one is probably my favorite one.

So I am going to walk you through my process of how I make my clutches. The tutorial! First off, for this particular clutch that I am making here I tried something new. Along with sewing I also love painting. (You can check out my paintings at my other blog: bluefoxstudio.blogspot.com.) I wanted to think of a way that I could meld the two together, so I decided to paint the fabric and then sew it into a clutch! Here are a couple pictures of me painting my linen. I used artist grade acrylic paints. It is totally permanent. I've carried this bag around for a couple weeks and that paint will never come off. Also, I apologize for the state of my hands in these pictures (the dry skin and chipped nail polish). Apparently, Ohio is part of the arctic regions now and I just can't put on enough moisturizer.


Here is your materials list:
(all of this can be found at your local fabric store, like JoAnn's)
Free pattern: Download PDF Here
1/4 yd. of outside fabric (cotton, linen, canvas)
1/4 yd. lining fabric (cotton)
1/2yd. lightweight sew-in interfacing
1/2yd. super heavyweight sew-in interfacing I believe I used Pellon 65
1 magnetic snap
Thread to match both outside and inside fabric
Step 1: Download the pattern PDF and cut out your fabrics and interfacings. You are also going to need one lightweight interfacing square cut at 1.5"x1.5". (I know the picture shows two. Oops!)

Step 2: Baste (use long sewing stitches) the interfacing onto the wrong side of the fabric pieces about 1/8" from the edge. You can pin them if you need them to be more stable during the sewing. Also, I have found that there are fewer puckers in the fabric if you sew it with the interfacing facing up

Here are all pieces with the interfacing sewn on:

Step3: Pinch the sides of the notches together, right sides together, for both the outside and the lining pieces and sew 1/4" from the edge. Make sure you backstitch.


And here are all the notches sewn together:

Step 4: Now you are going to install the magnetic snap. You will want to use the skinnier half of the snap for this part. Mark the bottom center of the lining piece of the flap on the interfaced side.

Pin on one of the interfacing squares, mark the center, and position the magnetic snap disk 3/4" up from the bottom edge and mark the two slots on either side of the disk.

Cut with a seam ripper or small scissors each of those slots right through to the other side. Be very careful with this step. It's very easy to cut too much. Make the slits as small as possible.

Just big enough to fit the "feet" of the snap through.

Slip the disk onto the "feet" of the snap...

...and bend the "feet" outward. This is very tough. I just use my fingers and wince through the pain because I'm impatient like that, but you can also find something to help you bend them. Use whatever you need to without damaging the fabric. Remove the pins.

Yay! Half of your magnetic snap is installed!

Step 5: (If you want to add any embellishments to the flap then now is your chance to do it before you complete this step.) Pin the flap pieces right side together. Sew 1/4" from the edge, starting at one corner and go around the bottom of the flap and back up to the other corner. Leave the long, straight side open for turning.


Trim the seam so it is about half as wide. Leave 1/8".

Step 6: Now turn it right-side out and press really well with an iron.


Step 7: Sew 1/4" away from the edge. Make it as straight and neat as possible. This is your decorative top stitching.


Step 8: Now you are going to install the second half of the magnetic snap. This is a bad picture because you can't see what pieces I'm using. Sorry. But you can see the two pieces in the second picture. Place the flap piece over one of the body pieces and pin them together with the flap piece sticking up 3/4".

Here's what it looks like when you flip it over.

Raise up the flap and mark right where the magnetic snap's knob touches the fabric of the body. Take out the pins and remove the flap.

Stick a pin in it.

Mark on the wrong side where the needle comes out.

Place the other magnetic snap's disk on the dot and mark the two slots on either side just like what you did with the flap. (One side of my magnetic snap did not come with disk for some reason. It's supposed to. So just assume it is there. Your really do need it so the snap does not pull away from the fabric on the other side. It anchors it down.)

Cut the slits and put in the "feet"of the fat half of the magnetic snap.

Bend the "feet" outward. Again, assume the disk is there.

Ta da! A magnetic snap on the outside perfectly installed!

Step 9: Here we start assembling the bag. Pin the flap and the second body piece (the one without the magnetic snap) right sides together and centered. Sew 1/8" away from the edge.


Now pin one of the lining pieces to the piece you just sewed, right sides together. The flap will be sandwiched in between.


Sew 1/4" away from the edge along the straight top edge.

Now you've got a sort of tri-flappy thing.

Now sew the other body piece and the other lining piece together at the top using 1/4" seam allowance.


Step 10: Now the whole thing comes together! Pin both halves of the clutch together with right sides together, putting the lining pieces together and the main body pieces together. This takes a little forcefulness as the heavyweight interfacing is really stiff. Force it into submission.


You are going to start sewing here (where my finger is pointing)...

... and stop sewing here. You need to leave an opening in the lining to turn the whole thing inside out.

Before you start sewing, make sure the seams of the notches are lined up perfectly...

... and the seams between the body and the lining are lined up perfectly.

Sew 1/4" away from the edge. Pivot and turn the whole bag when you get to where the lining turns into the main bag and visa versa.

Let the bag go in whatever direction it wants to. It will look like this when you reach the notch areas. If you try to force it flat you are only going to make it more difficult to sew and your sewing lines will get wobbly.

Here is your opening in the lining for turning.

Trim away the excess to about 1/8". It reduces a lot of bulk.

Don't trim where the opening in the lining is.

Step 11: Now, believe it or not, you are going to turn the whole thing right side out through the hole you left in the lining. This is pretty difficult as the interfacing is super stiff, but it will work. Trust me. Be patient with this step and work it through a little at a time. It takes a couple minutes. If you think you might have made the hole too small just use your seam ripper or scissors to cut a couple of the stitches to open it wider.

It kind of looks like some weird snail coming out of its shell.

Yay! All turned!

Step 12: Now take the hole you left in the lining, press it flat and sew as close to the edge as possible to close it up. Make sure you backstitch so it doesn't undo itself later.


Step 13: You can press the upper edge of the bag if you want, but sometimes, it's just too difficult, and I couldn't press it on this bag anyway because the iron would melt the acrylic paint. Normally, I just start sewing it without pressing it. You need to top stitch the upper edge of the body of the bag to pull the two layers together and make it nice and crisp and professionally finished.

Make sure you keep the lining pushed down inside the bag as you are topstitching. It will want to creep out and then you will have to rip out stitches to fix it.


You have officially made a clutch! Trim off all the loose threads and enjoy!


I would love to hear any questions you may have or if any of my tutorial is confusing or hard to follow. I want to fix any problems with it asap and help you with any troubles you may have. Also, if you do make one of my clutches please send me a picture!! I would love to see your work! If I get a few pictures of your clutches you all have made then I can make a brag post on my blog of them!
Happy sewing!
Is there any way that i can print the instructions ?
ReplyDeleteWell, I don't have anything put together to print, but I can make a pdf of the instructions if that helps. Did you want it with or without the pictures?
DeleteYou could just print from your browser :)
ReplyDeleteWhy not use iron on interfacing? Wouldn't that work better?
ReplyDeleteThank you so much!! I just made one with straps for a daughter that likes little purses with the cross body straps. It is perfect :) Now I think I will make a larger one with small handles and interior pockets for my mom. Thank you so much, I love this tutorial!!
ReplyDeleteI highlight the instructions/photos and paste to a Word document. Then I save to my documents. That way, I can edit the photos larger or smaller as I need. I usually edit them smaller so there aren't so many pages to print out
ReplyDeleteThe post is written in very a good manner and it contains many useful information for me. Men Jeans
ReplyDeleteClutches
What are the finished measurements? I tried it but mine feels like its smaller than yours. Of course it was my first attempt. It is a very cute pattern though. Thank you for sharing.
ReplyDeletejust found this blog..thanks for your sharing of the tutorial..
ReplyDeleteIf you have mentioned those with the measurements means so useful..
ReplyDeleteRachel, thank you so very much for your free pattern and instructions! You have made the instructions so easy to follow. I often have mishaps when I sew, but have not run into any problems with this clutch. I have made two as gifts (using a photo printed on the lining fabric to personalize it), one in oilcloth, and one with a detachable strap, and I have more in mind for the future! Thanks again.
ReplyDeleteHi there, thanks for this, i think its beautiful, just love the shape! And I want to start one right away, impressive model to still work since I see its many years you wrote this :) However the download pattern, link, doesnt work. Is there anyway you can check it, please?
ReplyDeleteanyway to get a pdf of the directions? thanks!
ReplyDeleteEin wunderschönes Muster und toll beschrieben, danke 🙂
ReplyDeleteLove the bag and instructions, what is the size of the bag finished please?
ReplyDeleteAppreciated!
ReplyDelete